| Table of Contents | ||||||||||
|---|---|---|---|---|---|---|---|---|---|---|
|
...
Click on the System navigation tab.
On the left, click the Utilities link.
Click the System Date/Time sub link.The following screen is displayed.

Select a Time Zone from the dropdown box.
Check the Enable NTP box.
Enter an IP address or a hostname for the NTP Serverpool.ntp.orgis a commonly used public NTP server. If no local NTP server is available this hostname can be used.
Click Save.
When changing the time or the date of a Enterphone System, the synchronizing of schedules and events are not done until the following day at midnight. For proper scheduling, please restart the Enterphone server using the reboot link from the Utilities section.
...
Click on the System navigation tab.
On the left, click the Utilities link.
Click the System Date/Time sub link.
Select a Time Zone from the dropdown box
Select the date from Set Date.
Select the time from Set Time.
Click Save to save the date and time.
Once the date is set, click the Reboot link at the bottom of the Utilities list.
Click the Reboot button.
Reboot button will be hidden if Enterphone portal is accessed from laptop, due to browser resolution size. So use zoom out option on the web browser to reduce the resolution from 100% to 80%.
System Card Format Support
The Enterphone Server has a built-in set of Card Format Definitions that determine how Wiegand data is being translated (e.g. Wiegand 75 bit, FIP-201 200 bit26 bit). Upon card swipe, Enterphone performs a sequential look-up of this list to find the best fitting definition.
...
In case no suitable definition is available, use the Default Card Format drop-down list to select a default format. To narrow down the search, type the card format, and it will list the results. You can click on the required card format directly. Please note that the card format definition in Enterphone is highly customizable. Please feel free to contact Identiv Hirsch Technical Support (support@identivprimissupport@hirschsecure.com) should you require a custom format.
...
| Note |
|---|
Parameter files should only be changed if instructed by Identiv Hirsch Technicians. |
The following parameter files are user-modifiable:
...
Main and peer configuration creates a link between two or more Enterphone units. The Enterphone panel can also be peered to a Primis instance server or Enterphone cube server. The Main servers automatically start copying data once a peer establishes communication.
...
Open the siteEngine.ini using the instructions from System Parameters.
Locate the line MainPeers=
Add the IP address of the main server. For example, MainPeers=192.168.123.101
Note: If the Main unit is a Primis instance server or Enterphone cube server, please set MQPeer=yes. Otherwise, for Main/Peer network containing only Enterphone panels, set MQPeer=noSave the siteEngine.ini
Restart the Enterphone peer system
...
This step could take an extended period of time if the database is large. Common Data includes Schedules, Businesses, Suites, Users, User Access Groups, Special Days, Sites and Card Data.
Enterphone Panel File Configuration
...
Use a graphic editor or Paint to create your own screensaver and name it to match the filename. Filename: screensaver_1280x1024.gif for Enterphone 19 and Kiosk, screensaver_800x1280.gif for Enterphone iQ. Once the file is ready use the Go to Systems > Administration > Update Media Files from the System tab to upload the file, use the Choose File button to navigate to the file location, select the file and click UPDATE. The original file will be over-written.
Restart the Panel using the Reboot link at the bottom of the Utilities page.
...
The Enterphone Bridge settings can be changed by using Identiv’s Hirsch’s Bridge Utility. This program (BridgeUtil.exe) is self-contained, does not require a special install program and should run on Windows XP, 7, 8.1 and 10.
...
Click on the Access navigation tab.
Click on the User Access Groups, Floor Access Groups or Guest Access Groups link.
In the Actions bar, click on Add Access Group. The following screen is displayed:

Enter a Name and a Description.

Select the Risk Levels during which this group will have access: Low, Guarded, Elevated, High or Severe (the current risk level is always displayed at the top of the Enterphone screen)
For more information on Risk Levels see the Alert Level Managementsection.Select a Controlled Area for this group.
Select a Schedule for the Controlled Area. If that controlled area is not going to be accessed by that User Access Group, leave the schedule as Always Off.
If you need an additional line for extra Controlled Areas and/or Schedules, click the + button beside the current line. To delete a line, click the x button.
Click Save.
Global User Access Groups
...
Create a new Controlled Area with the elevator reader.
In the new Controlled Area’s Floor tab, select all the associated Floor Areas; specify the desired activation time, and click +.
...
Create a Floor Access Group
...
Screen | Resolution size of the screen |
|---|---|
19-inch | 1280x1024 |
21-inch | 1080x1920 |
IQ 10-inch | 800x1280 |
15-inch | 1024x768 |
Primis/Enterphone V12 updates
Enterphone Mobile App Enhancements
V12 Enterphone can make SIP (Session Initiation Protocol) calls to Hirsch’s Enterphone Mobile App. Once enabled in the license, the enterphone panel will be assigned a unique SIP user account.
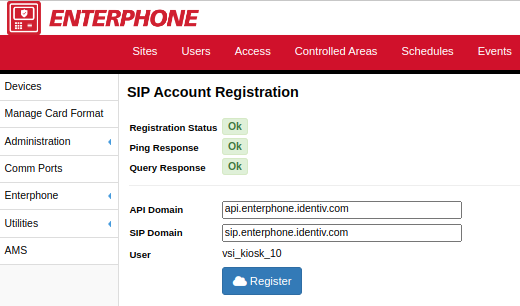
To verify the SIP account registration status
Go to System->Enterphone->SIP
The SIP account name is shown under “User”
Look for “Registration Status”
If the status is “Not Registered”, click “Register” to register the SIP account.
Once registration is done; statuses such as Registration, Ping Response and Query Response should show “Ok”. Should any one of the three statuses fail, please contact Hirschsupport.

Differences in SIP-Enabled Panels
Each tenant is entitled to a SIP account.
Once a suite is assigned to a tenant/user that owns a SIP account, that suite cannot be shared by other tenants. However, suites can be shared among non-SIP users.
The tenant can register his/her Enterphone Mobile App with the SIP account’s QR code which is available from Primis Web Admin.
For SIP/Enterphone Mobile equipped tenants, SIP accounts will be the primary number to calls. The regular suite phone number will be the alternate number; that is, when SIP calls would not go through, the Enterphone panel will dial the regular number. The regular alternate number under suites will be ignored in this case.
Note that “snapshots” will not be available once SIP is enabled. This is because WebCam is occupied by the SIP client on the Panel.
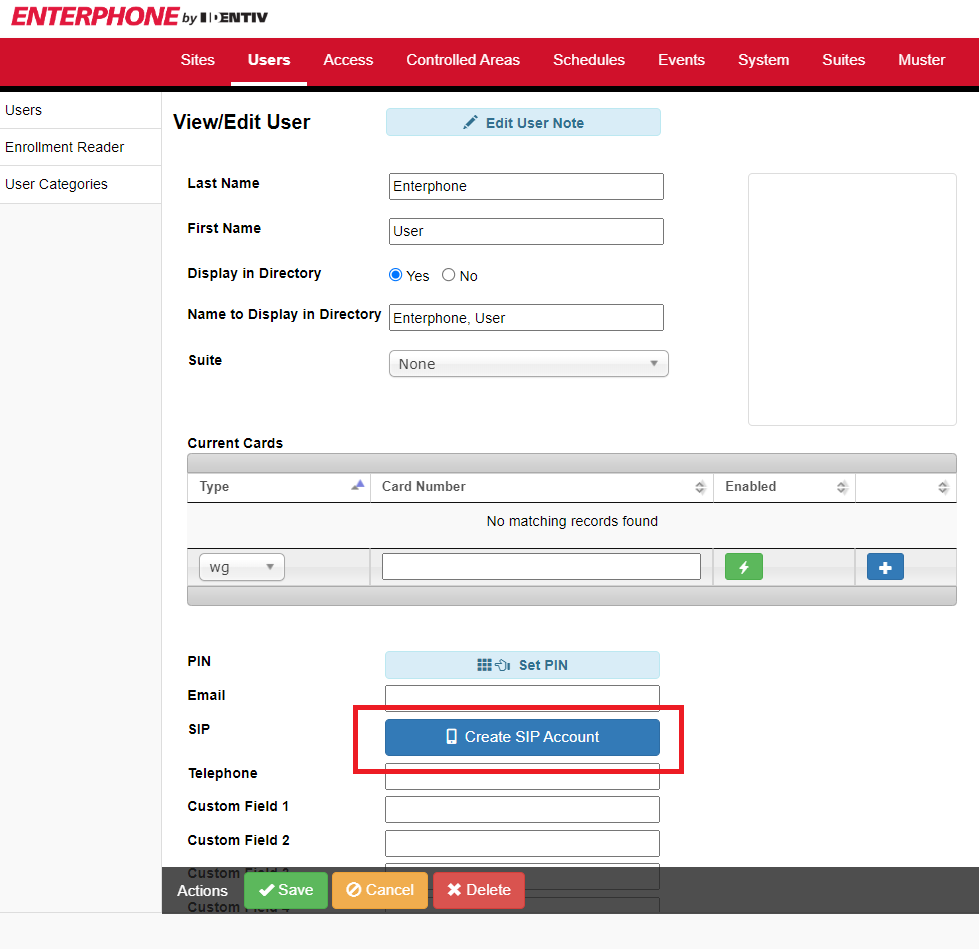
To create a SIP account for Enterphone Mobile
Go to Users
Either create or edit an existing user
Click “Create SIP Account”
Once a SIP account is created, the account name will appear along with a delete account button, a QR code button and an email button:
To remove the SIP account, click the “[ X ]” button.
To show SIP account’s QR code, click the blue button
 to the right.

...
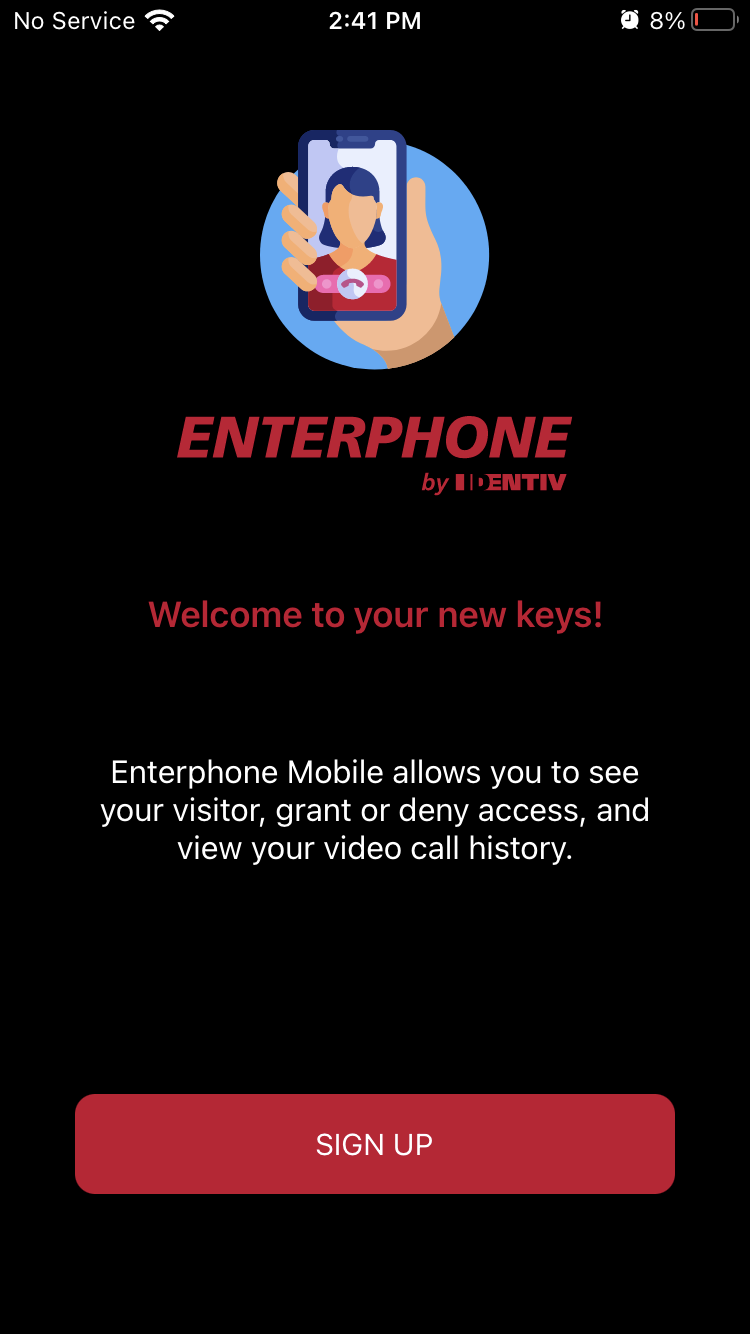
Enrolling Enterphone Mobile App to Hirsch’s SIP network
Mobile App users can sign up to Hirsch’s SIP network with the QR code provided by Enterphone Web Admin.
To enroll, start the Mobile App and click “Sign Up”
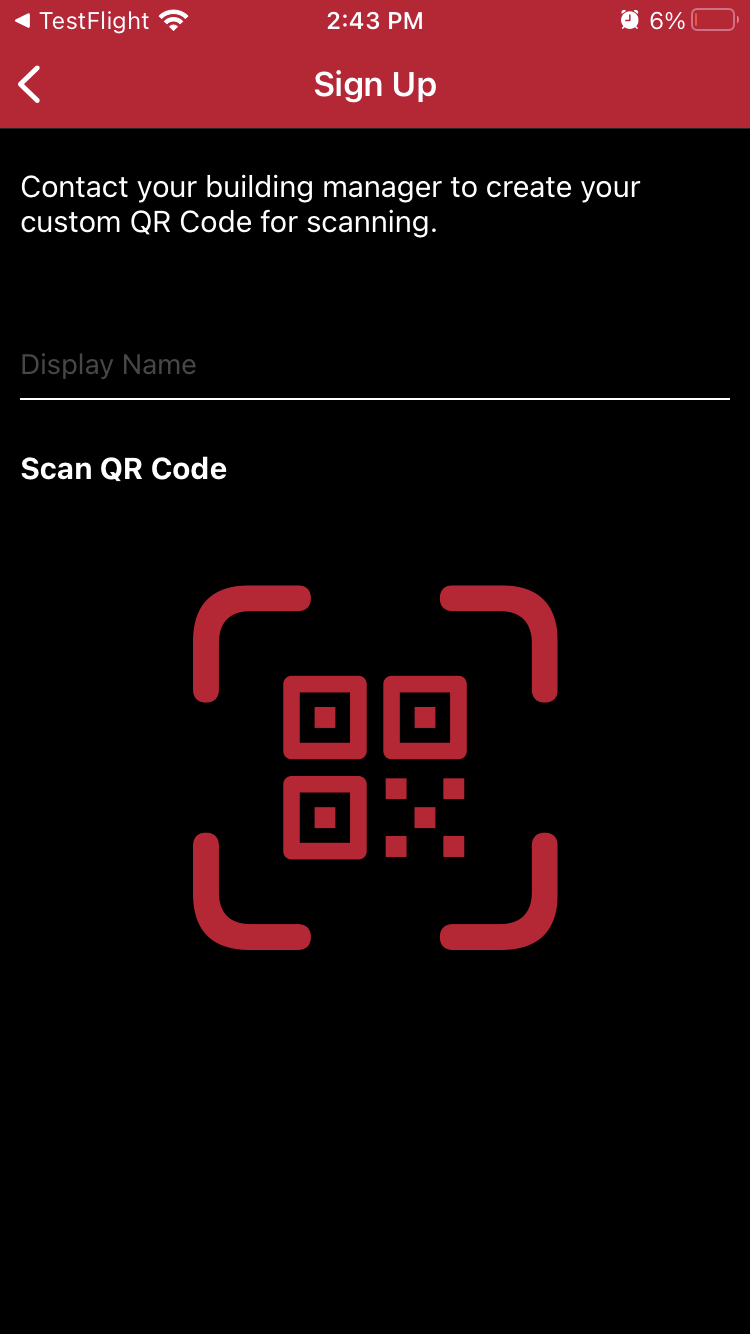
Click the “Scan QR Code” icon in the center and present the QR code from Enterphone Admin:
Once successfully enrolled, all Enterphone panels under the same customer account will be listed:
...
Alternatively, administrators can send SIP account registration emails to end users by clicking the “Email QR Code” button:
...
Once this email is received by the end user’s mobile device; clicking the link in the email can register the device to the Hirsch SIP network. If the Enterphone App has not been installed, this link will automatically download it from the internet.
Primis Server V12 SIP Support
Primis V12 server can work with SIP capable Enterphone panels in a main/peer network.
To verify that the server is connected to Hirsch’s SIP service.
In System->Enterphone->SIP, verify that both Ping and Query Responses are of “Ok” status.
Note that the “Register” button is only necessary when API or SIP domains have changed.
...
Notice that for main servers, the “Registration Status” is not present as opposed to that in Enterphone Panels. This is because servers do not participate in SIP calls.
All other administrative functions remain the same as that in Enterphone V12 Panels (e.g. add/edit users/suites, SIP account creation/enrollment).